Car Audio Calculators
- AC Voltage Calculator for Setting Gains
- Wire Size Calculator
Essential Test Tones
- Subwoofer Gain Setting (50Hz Test Tones)
- Midrange Gain Setting (1,000 Hz Test Tones)
- DSP Tuning (Pink Noise)
Most Popular DIY Car Audio Tips & How Tos
View All Posts:
Rolling with the Beats: DIY Car Audio Installation Essentials
Getting Started with DIY Car Audio
Ready to transform your car into a rolling concert hall? Before you start blasting beats, let’s tackle the essentials of DIY car audio installation. Knowing how to match wire harnesses and understanding power sources can save you a heap of headaches and make your install smoother than a fresh vinyl record.
Matching Wire Harnesses
First things first: your car’s stereo setup is like that puzzle you never finished. But no worries, matching wire harnesses is easier than piecing together your grandma’s 1,000-piece jigsaw! Each harness connector is unique, which makes figuring out where everything goes a bit like color-by-number—just more fun.
Wiring Diagram to the Rescue
To install a car stereo, you need to match the wires of your car’s harnesses to the new stereo’s harnesses. Each harness is unique, so they’ll fit together like PB&J—no guesswork needed. However, if things seem fuzzy, checking the wiring diagrams can clear it up (Wikihow).
| Wire Color | Function |
| Yellow | 12V Constant Power |
| Red | 12V Switched Power |
| Black | Ground |
| Blue | Power Antenna |
| Blue/White | Remote |
| White | Left Front Speaker (+) |
| White/Black | Left Front Speaker (-) |
| Gray | Righ Front Speaker (+) |
| Gray/Black | Right Front Speaker (-) |
| Green | Left Rear Speaker (+) |
| Green/Black | Left Rear Speaker (-) |
| Purple | Righ Rear Speaker (+) |
| Purple/Blac | Right Rear Speaker (-) |
| Light Green | Parking Brake |
| Orange | Illumination |
Feast your eyes on this table, memorize it, or just keep it handy while you’re knee-deep in wires. Having these color codes at your fingertips makes connecting everything a breeze.
These are the main aftermarket wire colors, but be sure to check your owners manual.
Connectors for a Seamless Union
In the world of car audio, proper wiring connections ensure your jam session won’t turn into a whimper. Vehicle-specific wiring harnesses help connect your new stereo to your car’s factory wiring. You can even make the connections on your workbench, saving you from playing Twister under your dashboard.
Understanding Power Sources
Now let’s get to the heart of the matter—power. Without it, your stereo is as useful as a chocolate teapot. Understanding power sources isn’t just essential—it’s mission-critical for your rockin’ road trip.
Old School vs. New School
Got an older car? Factory stereos in older American cars (circa pre-1980s) often use “shaft-style” stereos secured via nuts and washers to the right and left knobs. This kind of install sometimes feels like defusing a bomb, thanks to potential obstructions like vehicle wiring and heater controls (Crutchfield).
Ensuring Proper Wiring
Incorrect wiring can lead to short circuits or, worse, a meltdown of your audio dreams. Precise wiring following manufacturer guidelines is crucial. And don’t forget to test everything before you button it up. Testing saves you from the dreaded scenario where everything’s installed, but nothing works.
Got all that? Great, you’re one step closer to being the DIY car audio installation maestro. For more tips and tricks, be sure to check out our articles on car stereo DIY tips and installing car speakers yourself.
Troubleshooting Car Stereo Issues
Gone are the days when you could just slap a boombox on the dashboard and call it a sound system. Modern car audio requires a bit more finesse. If you’ve dived into the world of DIY car audio installation and hit a snag, don’t fret. Let’s tackle those pesky stereo troubles head-on.
Addressing Power Source Problems
Your car stereo needs power, obviously. If it’s not powering on, let’s check the basics:
Step 1: Check the Connections
Make sure all wires are connected properly. Refer to the wiring diagrams for your car and new stereo.
Step 2: Inspect the Power Wires
Remember, there are two power wires: one that’s always hot for memory, and one that’s hot only when the ignition is on (AudioMotive).
Step 3: Examine the Ground Wire
A good ground is critical for avoiding annoying issues like alternator whine (AudioMotive).
Check out this post: Grounding Amplifiers Properly to Avoid Unnecessary Troubleshooting
Here’s a quick table for troubleshooting power source issues:
| Issue | Potential Fix |
|---|---|
| No Power | Check all connections, ensure both power wires are connected |
| Intermittent Power | Inspect ignition wire and ground connections |
| Noise (Alternator Whine) | Check and improve ground connection and/or RCA routing (if applicable) |
Dealing with Wiring Issues
Incorrectly wired stereo systems can be a nightmare.
Step 1: Verify Wire Connections
Match each wire from the car’s harness to the new stereo’s harness (Wikihow). If your car doesn’t use wire harnesses, you’ll need to manually match the individual wires.
Step 2: Check for Shorts
Inspect the wires for any exposed sections or shorts, which can lead to malfunction and even damage to your car.
Step 3: Inspect Speaker Wires
Crackling speakers? Old or damaged speakers might need replacing.
Step 4: Test all Functions
Test your audio system components before locking panels back in place to ensure they work properly.
Fuse Replacements
Blown fuses are a common boo-boo. They’re designed to blow if there’s a power surge to protect your system.
Step 1: Locate the Fuse
Find the car’s fuse box and identify the stereo fuse.
Step 2: Inspect and Replace
If the fuse looks blown (the filament is broken), replace it with one of the same amperage.
If it doesn’t look blown, test it with a meter or test light or fuse tester.
Here’s a basic table for fuse issues:
| Symptom | Cause | Solution |
|---|---|---|
| No Power | Blown Fuse | Replace with same amperage fuse |
| Intermittent Power | Loose Fuse | Secure the fuse in place |
For more information and tips, check out our handy guides on car amplifier installation diy and car stereo diy tips. Keep jamming and happy troubleshooting!
Necessary Tools for DIY Installation
Ready to turn your car into a mobile concert hall? Great! But before you start rocking, you’ll need some gear. DIY car audio installation is all about having the right tools in your arsenal. Let’s dive into the essentials and a few specialty items that’ll make you the maestro of car audio.
Essential Tools for Success
First, let’s cover the must-haves. These are the tools you can’t live without when installing car audio yourself. Think of them as the bread and butter of your DIY toolkit.
My top 5 tools are linked below and consist of:
- Crimpers/cutters/strippers (I’m a pro and use the same tool for all 3 lol)
- Panel Poppers (I prefer the yellow ones from Harbor Freight – seriously, they’re amazing)
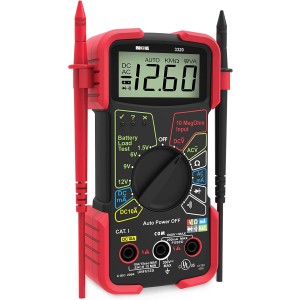
- Digital Multimeter
- Pick Tools
- Drill/Impact Driver
5 Essential Car Audio Tools Every Installer Needs
All Recommended Car Audio Tools, Accessories, and Equipment
Having these tools will ensure you’re not improvising with butter knives and duct tape. Starting with the right equipment can save time and headaches.
Where to Get Them?
Most of these tools are available at your local hardware store, online marketplaces, or specialty automotive stores. Watch for discounts, promotions, or bundle deals to save some bucks.
And there you have it! Armed with these tools, your journey into the world of DIY car audio installation will be smoother than your favorite bassline. Now, go and unleash the beats!
Benefits of DIY Car Audio
Cost Savings and Opportunities
When you decide to take the plunge into the world of DIY car audio installation, your wallet will likely thank you. By rolling up your sleeves and tackling this project yourself, you’ll avoid labor costs that can significantly inflate the price of a professional installation. There’s also the thrill of finding the best deals on components and tools, not to mention the sales, discounts, and promotions lurking on various online marketplaces.
So, how much can you save? Most shops charge between $100 to $200 per hour. Obviously they will be a lot quicker than the average DIYer, but you’ll save hundreds on each install. Just be careful.
Learning Experience and Knowledge
Taking on a DIY car audio installation is like earning your unofficial degree in automotive electronics—without the grueling exams. You’ll learn the ins and outs of your vehicle’s electrical system and gain a deeper understanding of audio components like speakers, amplifiers, and wiring.
Imagine talking shop about impedance and RMS power while you’re at a party. Pretty classy, right? This newfound knowledge won’t just make you the most interesting person at any gathering. It also empowers you to handle future maintenance and troubleshooting like a pro. Plus, you get the full freedom to customize and tweak your system to fit your preferences.
Common Mistakes in DIY Installations
When embarking on a journey into the realm of DIY car audio installation, it’s easy to stumble along the way. From research mishaps to poor tool choices, here are the most common mistakes and how to avoid them.
Importance of Research
Before you grab those tools, do your homework. Skimping on research is a rookie mistake. Understanding your specific audio system, ensuring compatibility, and perusing installation tutorials are essential for a smooth DIY experience. Ignoring these steps can lead to frustration, incompatibility issues, and a car that sounds like it’s gargling marbles (San Diego Car Stereo).
Ensuring you have the right car stereo diy tips can make or break your installation.
Tools and Safety Measures
Using the wrong tool for the job is like trying to slice a steak with a butter knife—ineffective and hazardous. Not having proper tools, such as wire strippers, crimping tools, and a multimeter, can damage your car’s interior and affect sound quality. Furthermore, safety risks escalate when you cut corners with low-quality tools (San Diego Car Stereo).
Always ensure proper grounding and use high-quality wiring to avoid negative impacts on your audio system’s performance.
Testing and Optimization
Some DIY enthusiasts make the fatal error of skipping the sound test and optimizations. Completing your installation without testing can leave you with a system that distorts, lacks balance, or misses clarity.
Neglecting to test and optimize means you might only realize these issues after painstakingly reassembling everything. Testing all functions before sealing everything up ensures any hiccups can be addressed quickly.
Avoid these common mistakes to ensure your DIY car audio installation hits all the right notes!
Pro Tips for Successful Installations
Congratulations! You’ve made it to the pro tips section of your DIY car audio installation journey. This is where you’ll learn how to make your installation sound as smooth as your favorite beats. Let’s dive into the essentials for proper wiring connections, grounding, and proficient testing methods.
Proper Wiring Connections
Making proper wiring connections is crucial for your stereo to function seamlessly. Think of it as the electrical version of connecting the dots – except if you mess up, your car might give you one heck of a light show.
Key tips to nail your wiring:
- Use Vehicle-Specific Wiring Harnesses: These handy harnesses connect your new stereo to the car’s factory wiring with color-coded simplicity. It’s like paint-by-numbers for your car stereo.
- Double-Check the Color Codes: Always confirm you’re matching the right wires. Purple should go with purple, not green – your car is not a Christmas tree!
- Secure Connections: Loose connections can result in annoying audio cut-outs. Use connectors and crimpers to ensure everything stays in place during your wildest drive.
Grounding Essentials
The ground connection is the calm amidst the storm of wires. Without it, your audio might sound more like static than symphony.
Essential grounding tips:
- Connect to Bare Metal: Your ground wire must connect to a bare metal part of the car’s chassis. Avoid painted surfaces like they’re hot sauce in a toddler’s hand.
- Avoid Noise: A poor ground connection can introduce signal noise, making your system sound like it’s being haunted by electrical ghosts. Ensure the ground connection is solid to keep things ghost-free.
Proficient Testing Methods
You’ve meticulously installed your car audio system, but you’re not off the hook yet. Testing ensures that everything works perfectly before you close up shop.
Testing tips for a flawless finish:
- Test Before Locking Panels: Before you snap all those panels back, test every bit of your new setup – speakers, lights, knobs, and buttons.
- Check Connections: Listen for any issues like poor sound quality or signal drops. Double-check connections if something sounds off.
- Stay Safe: Don’t forget to ensure all wires are tucked away safely to prevent shorts and future headaches.
By following these pro tips, you’ll be well on your way to becoming a DIY car audio installation maestro. Happy wiring, grounding, and testing – may your beats always be bumpin’!
