Car Speakers Installation Made Simple
I’m sure you’ve heard about how important car speakers installation is but get overwhelmed when you try to do a “proper install”.
They tell you to deaden your whole door twice…
Build intricate door panels or kick panels…
CNC machine your own fancy speaker adapters.
And while all of that is great if you have the time and can afford it, I’m not patient enough for all of that for a simple install.
Especially when it comes to a customer’s car that doesn’t want to pay for all of that.
But I also don’t want to just screw a speaker into their door panel and call it good. Like this install I had to fix recently that was done buy a guy that had “been installing for 25 years”:

So I’ll share with you my simple 3 step method for speaker installs. This is my go-to method for installing speakers 90% of the time.
This is what I would consider the bare minimum. Obviously you can do more as you see fit for your install, but any less is just plain lazy and won’t sound very good.
Simple 3 step car speakers installation
Replacing car speakers comes down to 3 simple steps (the wiring details will be covered in a future post. This will focus on the physical mounting and installation process)
-
Step 1 – Sound Deadening
-
Step 2 – Speaker Adapter
-
Step 3 – Foam Rings
Following these simple steps will give you a great sounding and great looking car speakers installation.

Step 1 – Sound Deadening
You don’t have to go all out with this. Just a simple square of sound deadener behind where the speaker mounts works wonders. Try to cover up any small to medium sized holes that are close to the speaker. But don’t cover up the door clip holes (I learn this the hard way all the time).
I also like to cut out the shape of the speaker hole and stick that deadener to the inside of the outer door skin.
I like to use a 2-in-1 sound deadener like SoundShield or SoundSkins. It’s got the normal type of damping butyl material but also a layer of foam on top. This saves time from doing the foam separately.
If you have any large holes near the speaker, I would recommend sealing them up too for best midbass response.
I like to use something like this foam board cut to size with sound deadener over it. This will be stiff enough to greatly increase the sound over a big hole next to the speaker. You could also be fancy and use some ABS or something.
Here’s a picture of my old STI door after filling in the big holes with foam board and sealing them up with SoundSkins.

Step 2 – Speaker Adapter

Speaker adapters are a must for car speakers installation. You can make them yourself (beware of MDF – it’ll get soggy in a door), or you can just buy premade ones. Again, doesn’t have to be anything fancy.
When replacing car speakers, these universal speaker spacers work great. There are also different thicknesses you can get depending on your application.
But if you don’t have a round cutout in your door (or wherever you are mounting your speaker), you can get a pre-made adapter that’s for your vehicle. Crutchfield is a great resource to find the speaker adapter you will need.
DO NOT USE WOOD OR MDF. I used to do this, but almost every time I did, the MDF swelled up and I had to replace it with a plastic spacer. Even MDF sprayed with bedliner material or sealant.
If you make your own, go with plastic. Whether it’s ABS, HDPE, or PVC. Just not wood. Trust me.
Another tip is to make sure you mount the adapter properly. Nuts and bolts or factory mounting locations if you can. I’ve also used self tapping screws before. Not sexy, but they still work pretty well.
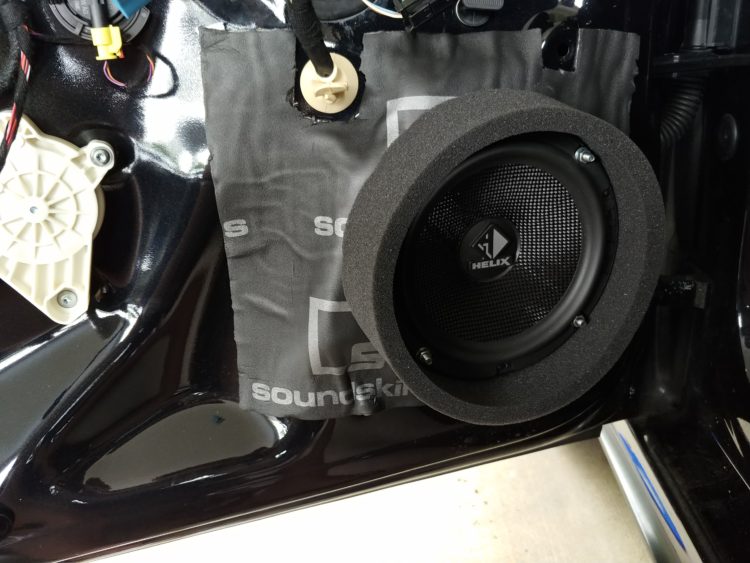
Step 3 – Foam Rings

I like to use Fast Ring type speaker rings for speaker installs. While these aren’t absolutely necessary, they’re still worth it.
Another thing you could do is go to Home Depot and get that foam door insulation stuff.
Put some behind the speaker where it mounts to the adapter.
You can also get some of the thicker stuff to put in front of the speaker to mimic the Fast Rings.
So there you have it. When replacing car speakers, this simple 3 step system is all you really need for a good car speakers installation.
If you don’t believe it works, do one door with this method and one door with whatever you were going to do before. You’ll see.
Awesome tutorial This is pretty much how I do speaker installs also.