
Many people like to save money by installing their parts themselves. It can also be fun and a great way to make sure it is done right. With this guide, I will explain how to install an amp. Whether it’s for subs or door speakers, the connections are still the same.
What You’ll Need
- Amp (duh)
- Subs/speakers
- Wiring Kit
- Aftermarket head unit or a line out converter to install with the factory radio
Amp/Speakers
The basics of amps and speakers can be found in Car Audio Basics and Basics to Upgrading Your System. If you have questions about how to match your amp and speakers, check out How to Select and Match Subs and Bass Amps. I will be doing a section soon on how to match amps with other speakers, but it is pretty much the same thing.
Wiring Kit
Now that you have your amp and speakers, it’s time to get the wires to hook everything up. For help selecting an amp kit, check out Selecting Amp Kits.
Aftermarket head unit or a line out converter
In order to send a low level signal to the amp through the RCAs, you will need an aftermarket head unit or a line out converter. Aftermarket decks have RCA outputs built in (usually at least one pair even on cheap ones).
Factory radios do not have RCA outputs built in, so a line out converter is needed to convert the high level speaker wire outputs to low level RCA outputs. I will do a how-to on installing these soon.
Some amps have high level inputs. In this case you don’t need a line out converter or RCAs, but if you are using an aftermarket radio, it is still recommended to use RCAs.
Installation
Now that you have everything you need, let’s move on to the installation.
The first thing you’ll need to do is get your layout right. If you are installing a sub, get it in the box and find a place for it. Find a spot for your amp where you can mount it securely and it can get good airflow.
Now you’ll want to disconnect the negative lead on your battery. This will keep you from shorting out any electronics in the car during installation.
Once everything is laid out, you can start running wires. It doesn’t matter what you start with, but I like to get everything run a short distance to a common point where I can run it all back to the amp together with the exception of the RCAs. It is best to run the RCAs down the opposite side of the car to avoid noise.
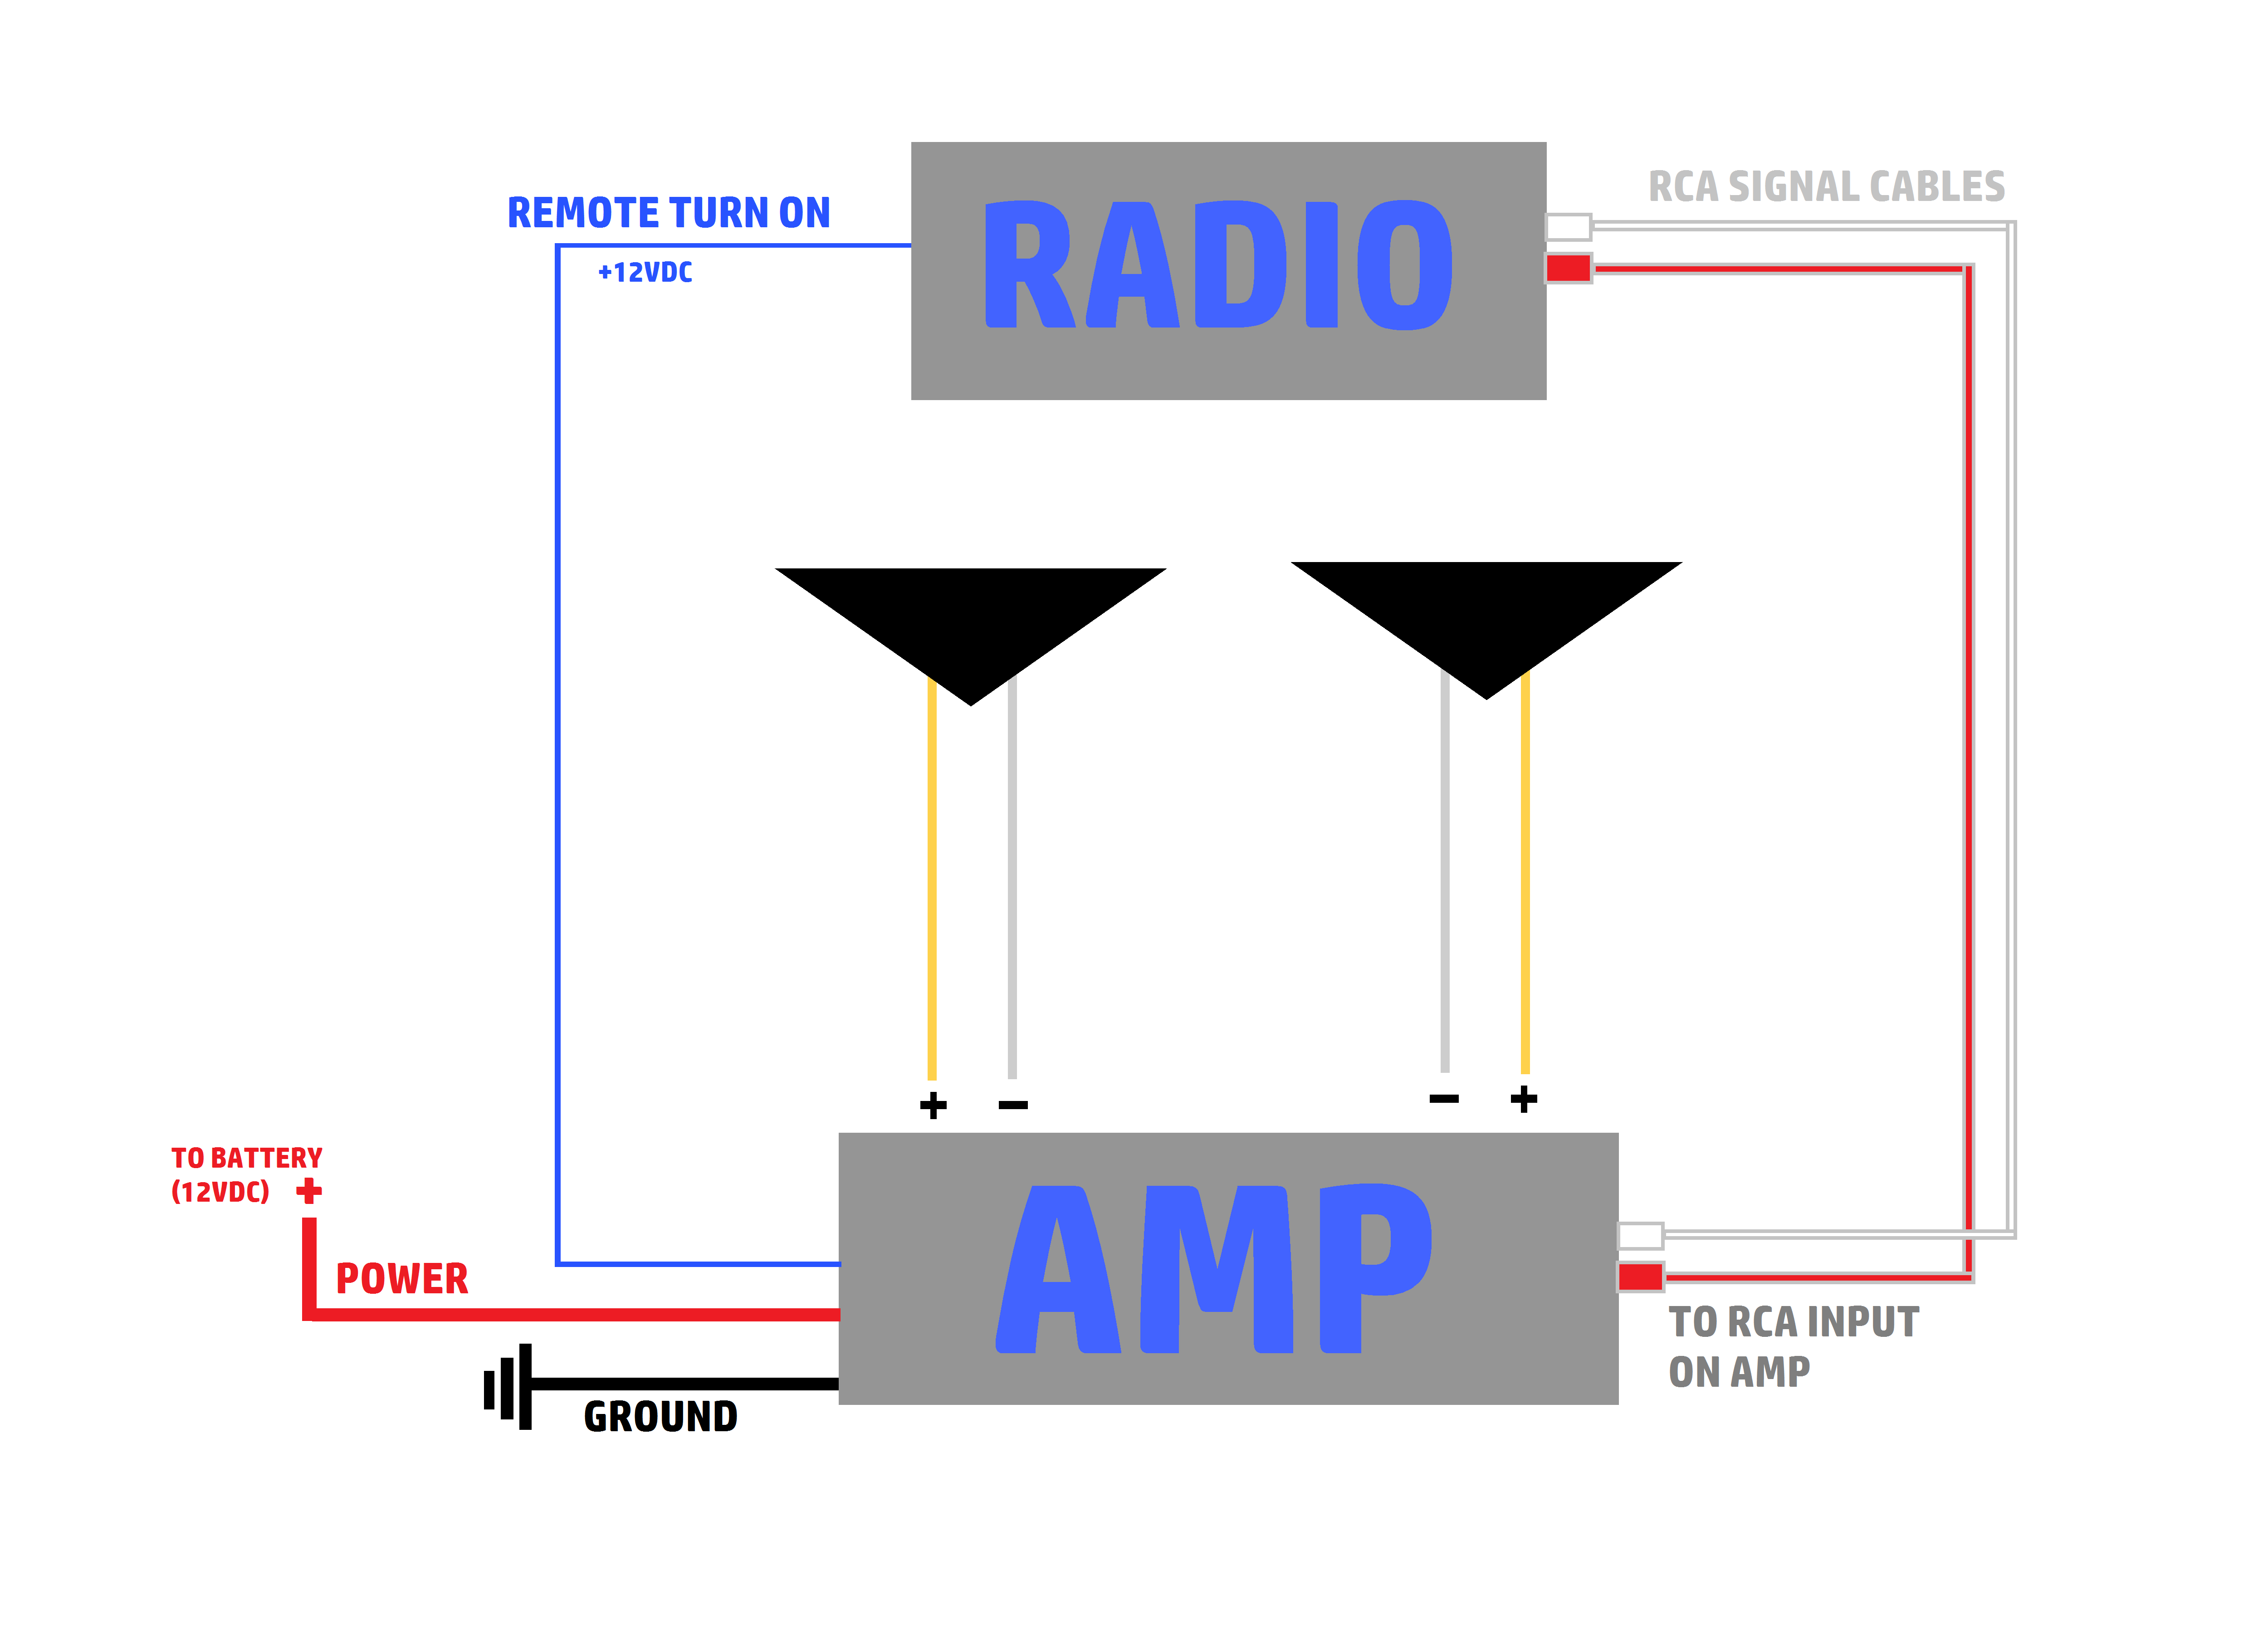
See this diagram to see what wires go where:

Power Wire
This will be one of the biggest wires in the kit. There will big a long one and a short one. The long one is the power wire. This goes from the +12V connection on the amp straight to the battery.
There should also be a fuse holder and fuse in your amp kit. The fuse should be no more than 18″ from the battery. This keeps the shortest distance possible of wire getting hot in case of a short.
Ground Wire
This will be the short big wire in your kit. The ground wire should be as short as possible, usually 3ft max, and even that is long. This wire will go from the negative terminal on your amp to the vehicle chassis or body.
When making the ground connection, make sure the ring terminal is secured on the end of the wire and find a good spot on the body of the car to scrape off the paint and connect the ground with a grounding bolt or self tapping screws.
It is very important to have a good secure ground connection free of any paint, debris, or rust. A lot of problems are caused by bad ground connections.
Remote Wire
This will be the single long wire in your kit. It is usually blue. It needs to be hooked up to a +12V source that gets power when you turn the key on. This is the wire that tells the amp to turn on when you turn the car on.
For an aftermarket radio: There will be a wire coming off the radio wiring harness (usually blue with a white stripe) that is for remote turn on. Simply connect your remote wire to it and run it back to the amp.
For a factory radio: You will need to find your own source for switch power. Sometimes this can be caught behind the radio, but if not it may be easiest to run it to the fuse box. Either way, fuse the wire!
RCA Signal Cables
These are the cables that carry the low level output signal from the radio to the amp to be amplified. These run from the back of the radio (on aftermarket units) or from your line out converter (on factory units) to the RCA input on the amplifier.
I see a bunch of people hook up their amp with no sound to find out they actually plugged the RCAs into the output on the amp. The output is so you can link two amps together without having to run another set of cables.
Speaker Wire
You are now ready to run your wire to your speakers.
For speakers installed in factory locations (doors, rear deck, etc.) it is usually easiest to run wires behind the radio and cut the speaker wires coming from the doors to the radio and tapping into them there. This is much easier than trying to run wires into each door.
For a sub, you just run the speaker wire straight from the amp to the sub.
Now that everything is hooked up, reconnect the negative lead on the battery and move on to tuning your amp.
Tuning
Once everything is hooked up, you need to tune the amp. There are a few ways to do this: by ear (the easy way), by using a multimeter (the better way), and by using an oscilloscope (the max output way). My old boss swore that it is good enough to set the gain by ear, and it usually was for what we were doing. But I always set gains with a multimeter now.
First you’ll want to roughly set everything:
Filter
Set to low pass for installing subs and high pass when installing other speakers. This prevents low frequency sounds from damaging your mid or high frequency speakers and high frequency sounds from playing through your subs.
Filter Frequency
Usually set around 80-100 Hz depending on personal preference and the speakers used.
Gain
Start with this turned down. This is by how much the incoming signal is amplified which equates to how loud your speakers play. You can’t just turn it up, though, as this can damage your speakers even if it doesn’t sound like it. Setting the gain properly will prevent clipping and overpowering your speakers and increase the life of every component in your system.
Once all of these are set roughly, you’ll need to set the gain.
For this, use test tone frequencies from 0 to -10db. Use about 40-50 Hz for setting your subs and around 1k Hz for setting your mids. Test tones can be found here.
And I’ve also heard use 60 Hz for the subs and 100 Hz for the mids (with the high pass filter turned off). This is because AC voltage meters are made to measure 50-60 Hz tones most accurately. Measuring a signal much higher (like 1k Hz) will result in lower readings, so measuring 100 Hz will be more accurate since it’s closer to 60 Hz than 1k Hz is. But it’s not too low to blow your speakers.
Also make sure all the EQ settings are zero or off (loudness, bass, treble, etc.). Once you get the amps set up and you decide you want to use some sort of loudness or bass boost, I would recommend checking the gains again to make sure they are still playing unclipped.
Easy Way
This really isn’t a recommended way to set amp gains, but it’ll work and be better than nothing.
- Start with the gain all the way down, and turn your radio up (playing the test frequency) to where it starts to distort and back it down a bit. On most radios this will probably be around 3/4 of the way up. You can go less to ensure your radio isn’t distorting but never turn it up past this level after you set everything.
- Now start turning the gain up until your speakers/subs start to distort and back off a bit.
- Done. Now play different sources of music to make sure one or the other isn’t a lot louder (which is usually the case). If so, set it to the source you use most and be careful when playing louder sources.
Better Way
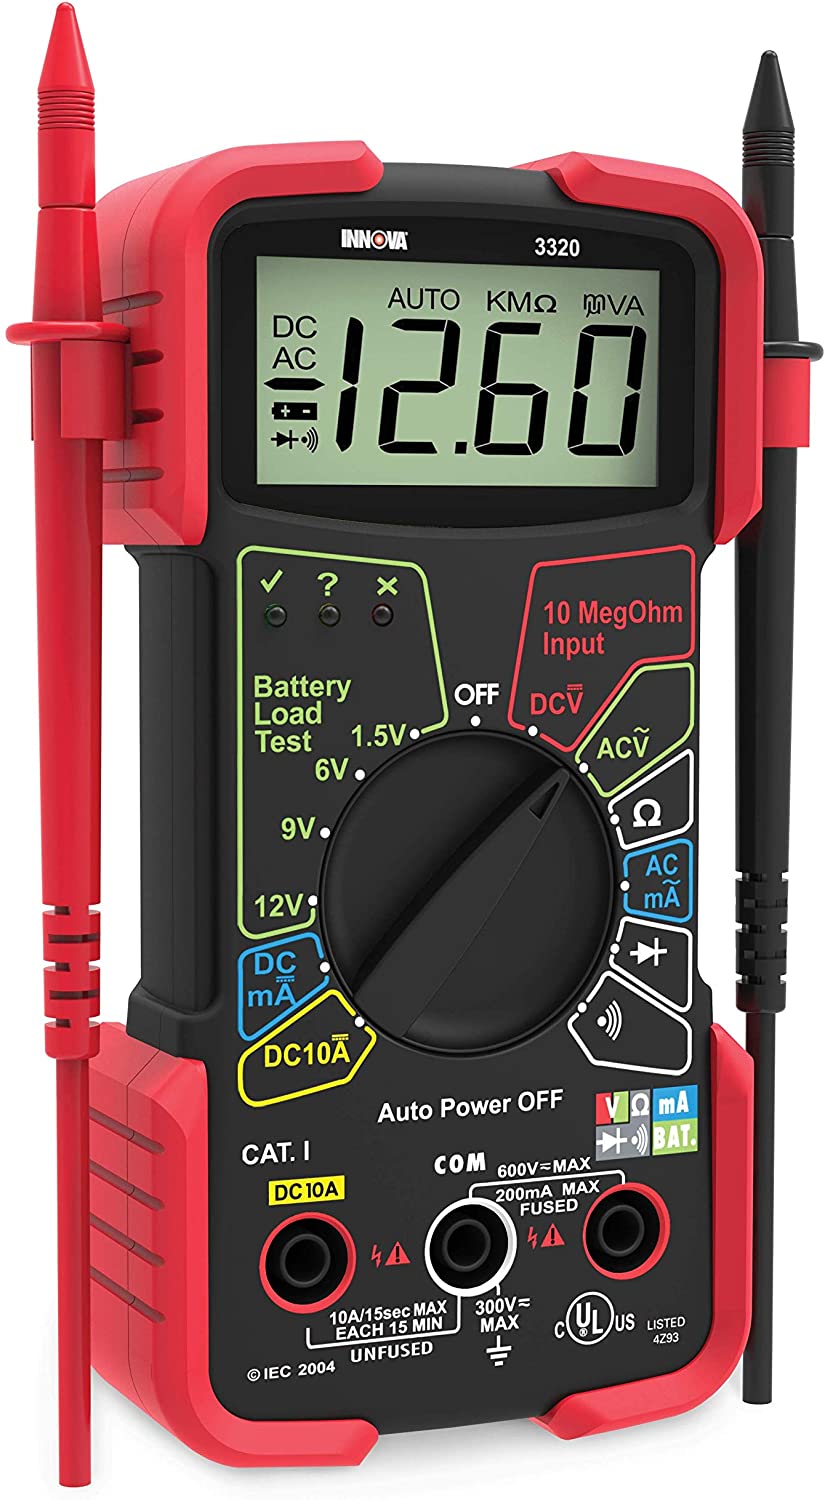
Now to the better way, which is a bit more technical and requires a multimeter.
This way works great if you have an amp that is rated properly, i.e. CEA rated. If you have some cheap amp that says “1500W” and cost $25, that amp probably doesn’t do 1500W and you won’t be able to use this method.
- Disconnect the positive speaker wires from the amp.
- Determine gain voltage: V=√PR where V=AC voltage, P=power, and R=resistance. P is going to be the RMS power of your amp in Watts at the impedance of the speakers you are running. R is the resistance of the speaker. And V is the AC voltage we are going to calculate to set the gain. Here’s an example: You have a 4 Ohm 500 Watt RMS sub and an amp that puts out 500W RMS at 4Ω. V=√500×4=44.72V. We are going to set the gain to 44.72V.
- Start with the gain all the way down, and turn your radio up (playing the test frequency) to where it starts to distort and back it down a bit. On most radios this will probably be around 3/4 of the way up. You can go less to ensure your radio isn’t distorting but never turn it up past this level after you set everything.
- Set your voltmeter to AC voltage and put the positive lead on the positive speaker terminal that is disconnected from the amp. Put the negative lead on the negative lead of the speaker that is still in the amp.
- Increase the gain until the meter reads your calculated voltage.
- Turn the radio down, and turn the car off. Reconnect the positive speaker leads, and you’re done!
To easily calculate the voltage you need, check out the Car Audio Calculator Page.
Max Output Way
This method will get the maximum RMS power out of your amp before it starts to clip.
This way would be best if your subs can handle more power than your amp or if you think your amp may be underrated.
This method uses an o-scope or distortion meter to set the amp gain to the max clean level it can put out.
You can use something like this Pokit meter (I actually got selected for the beta testing and like it but the small size makes it kinda hard to use). The Pokit meter also has a max input of 42 VAC, so it’ll work for most stuff but not super high power amps.
Or an actual oscilloscope like this.
Or a distortion detector like the Steve Mead Designs DD-1. This is very popular in the car audio world and can take an input up to 125 VAC.
This method is similar to using a multimeter, but instead of setting the gain to a certain voltage level, you just set the amp to clip then back off a tad.
- Disconnect the positive speaker wires from the amp.
- Start with the gain all the way down, and turn your radio up (playing the test frequency) to where it starts to distort and back it down a bit. On most radios this will probably be around 3/4 of the way up. You can go less to ensure your radio isn’t distorting but never turn it up past this level after you set everything.
- Hook up the o-scope or DD-1 to the amp channel you are setting.
- Increase the gain until the DD-1 distortion light turns on or the sine wave on your scope starts to become flat (clipped).
- Back off on the gain a tad until you have a clean signal.
- Turn the radio down, and turn the car off. Reconnect the positive speaker leads, and you’re done!
Now that your gains are set, you can fine tune your cutoff frequencies to your liking.
Finishing Up
After all of this is completed, secure the amp and sub down to prevent them from sliding around and yanking wires out. Tire your wires together to make them nice and pretty, and your done! See, it’s not too bad.
Very detailed guide, it was very useful