Car Audio Tools for Quality Sound System Installation | Best Equipment & Accessories
Top 5 car audio tools every car audio installer should have in their toolbox
Obviously there are more than five car audio tools you need for installations. I’m assuming you have the basics such as drill, screwdriver, wrenches, etc.
These five tools are more specific to car audio and while not absolutely necessary, they will definitely make any install a breeze. And if you are serious about your installs, you will have these in your toolbox.
So here’s my list of the top 5 car audio tools:
This website contains endorsements for products and services which means when you click on a link that we recommend, we may receive a commission at no cost to you.
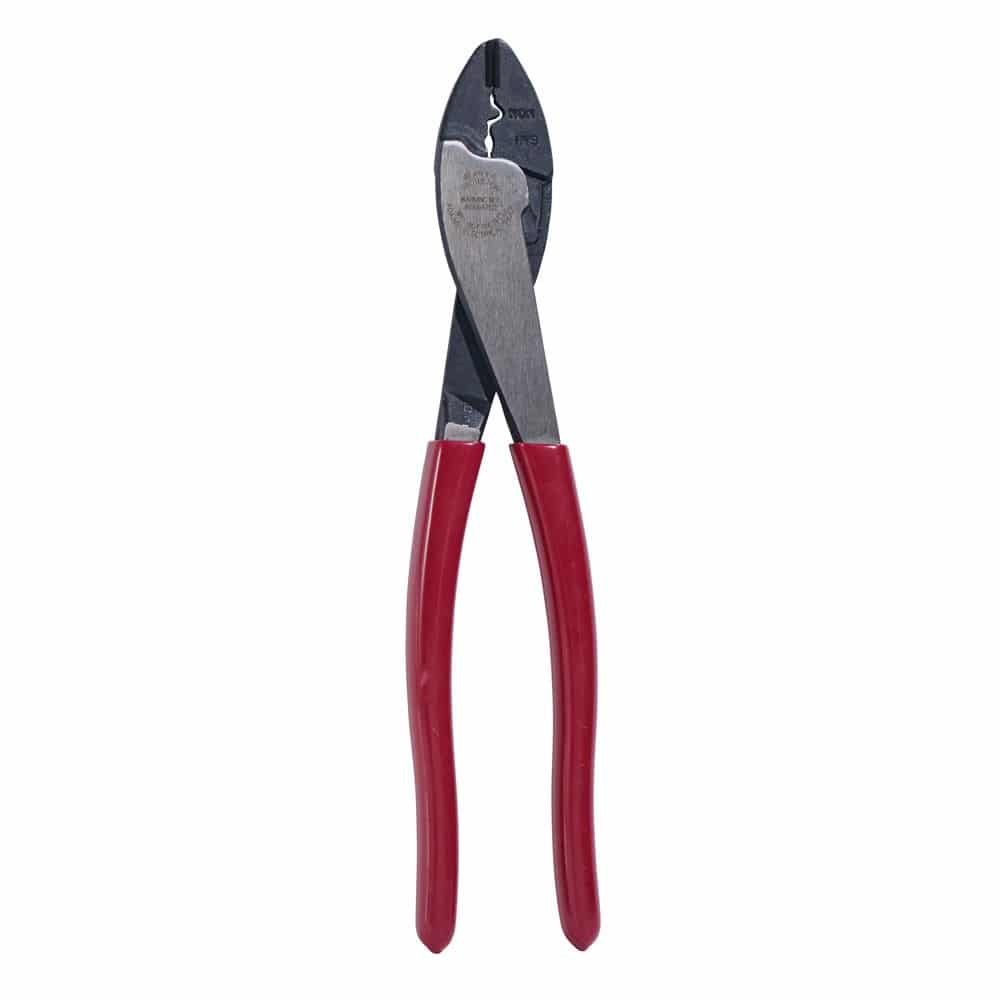
1. Car Audio Tool #1 – Crimpers/Wire Cutters
My crimpers are probably my most used tool when I am installing something.
(Part of that may be because I use them as a crimper, cutter, wire stripper, pry tool – pretty much anything I can use them for, I do.)
Here are a few reasons I love my crimpers so much:
- I use these Klein crimpers with the wire cutter on the end. So I can use them to cut wires, strip wires, cut tape off of wires, etc.
- I use butt connectors for all of my connections. If you were an early subscriber to my email list, you’ll know why I prefer crimped connections over soldered – but that’s a topic for another time. (Long story short, properly crimped connections are just as good or better in a car than soldered connections – and they’re quicker too.)
- These Klein crimpers are the best I’ve found. They just feel right.
- They’ve lasted me about 10 years so far and still work just as good as day 1.
Here’s a great video on how to make proper crimped connections:
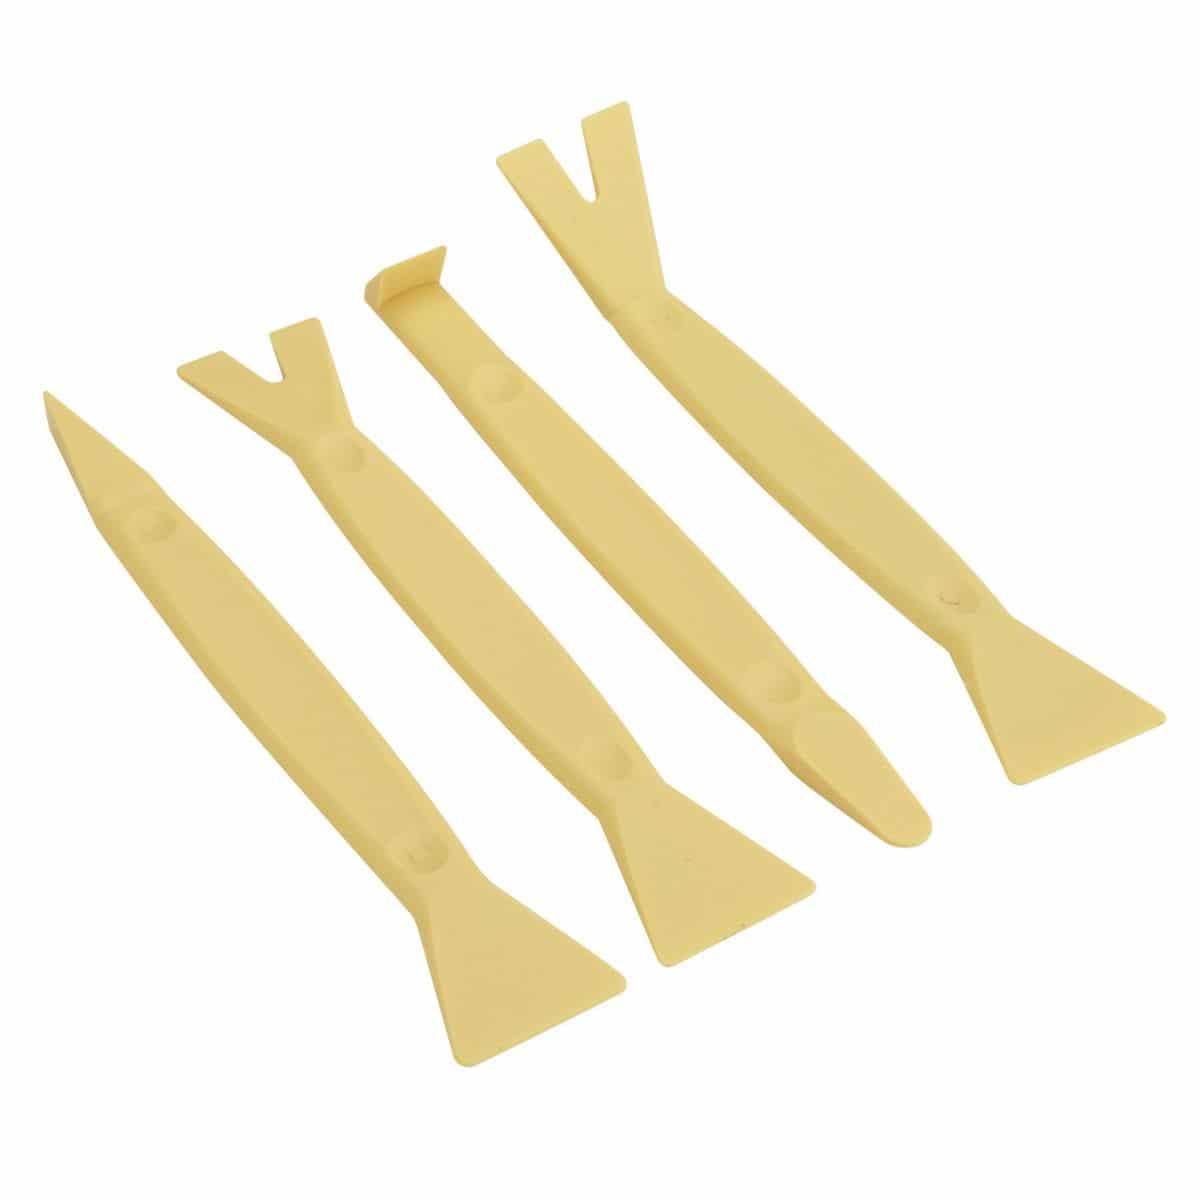
2. Car Audio Tool #2 – Panel Poppers
Panel poppers (or pry tools) are essential when removing interior trim.
Not much explanation needed here.
Take apart your car without damaging it. These trim tools from Harbor Freight are the best in the biz. They are also some of the cheapest.
I am currently on my third set but only because I lost the first one and the second set is finally starting to come apart after 10 years of hard use!
Another one I recommend is a thin tip metal pry tool. These are super thin and can get into tight spots.
Just be careful because they can mar the surface easier than the plastic ones.
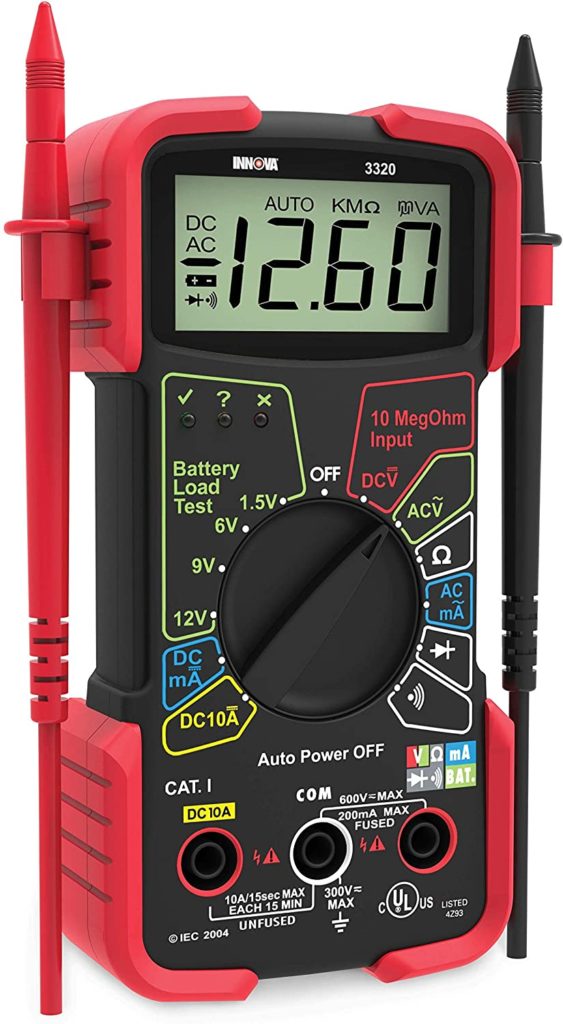
3. Car Audio Tool #3 – Multimeter
Multimeters are one of the most useful tools an installer can have.
Multimeters have a ton of uses for car audio. A few of the most common uses are:
- Checking DC voltage to find power wires, test batteries or alternators, and and find switched power among others
- Checking resistance of speakers or ground points
- Using continuity mode to test wires or grounds
- Using AC voltage to set amp gains
- Troubleshooting almost anything in a car
Buying a multimeter won’t help you much unless you know how to use it. The video below should help you out.
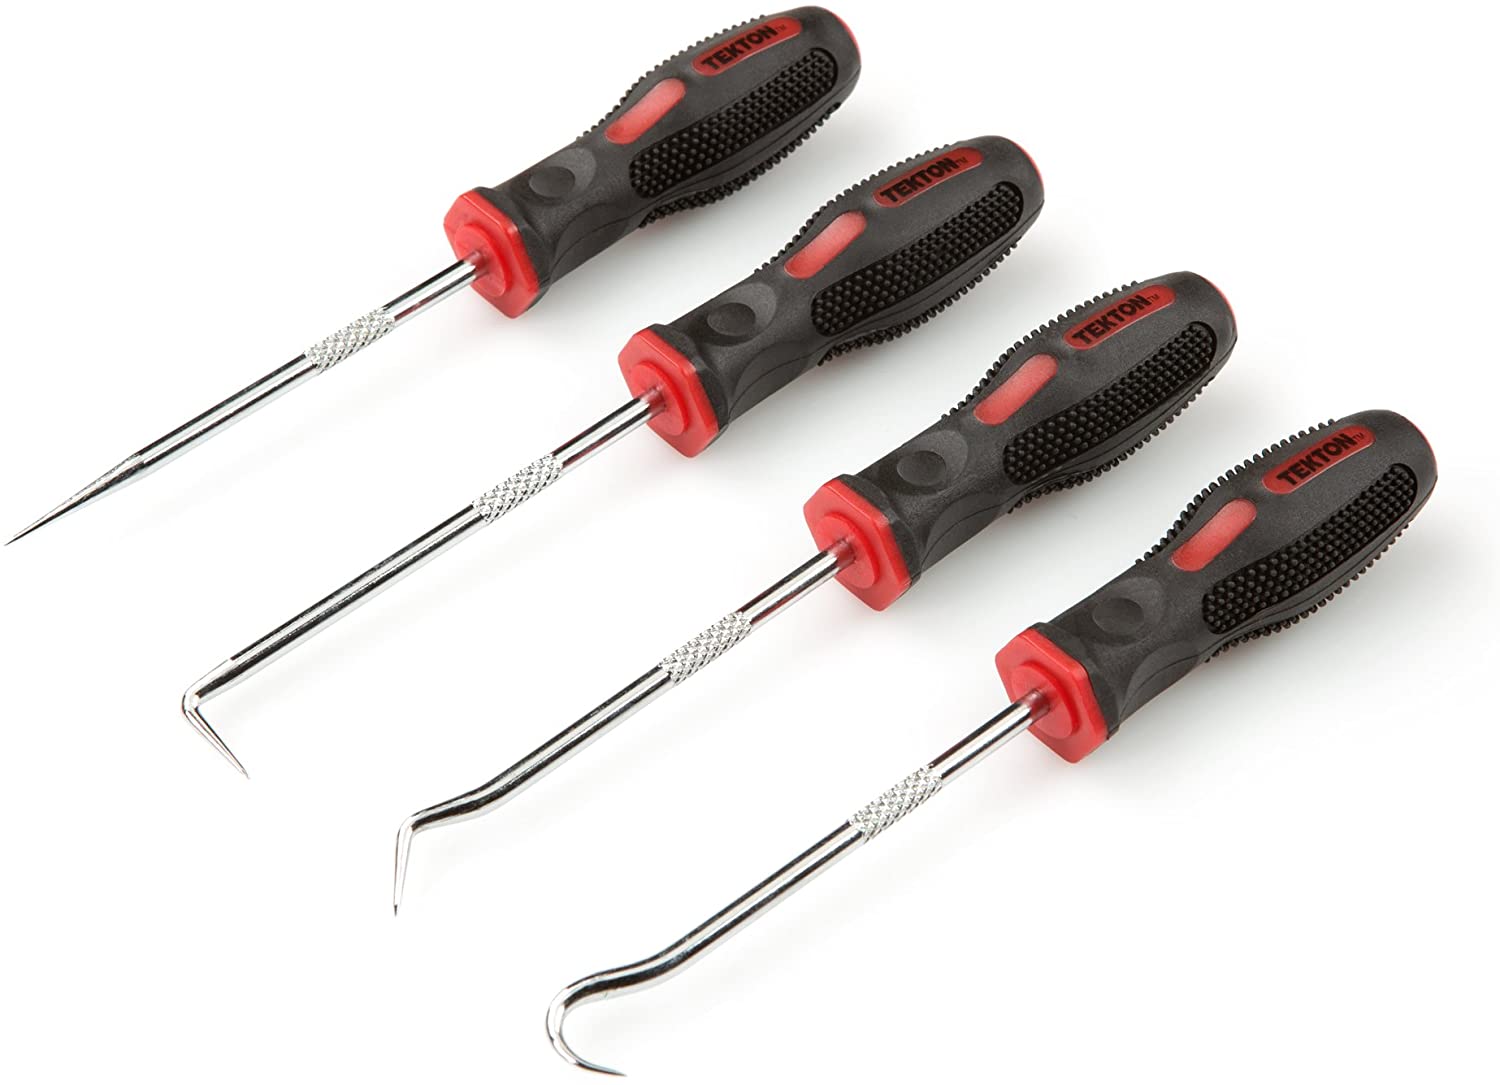
4. Car Audio Tool #4 – Pick Tools
Pick tools are great for removing all the tiny little hard to get to things like screw covers behind door handles or certain pop clips.
I like these el cheapos from Harbor Freight. Not because they’re the best but because I’m cheap.
If you want something a little more robust or don’t have a Harbor Freight nearby, these will do the trick.
The rounded hook tool is great for pulling a certain wire out of a bundle for easier access.
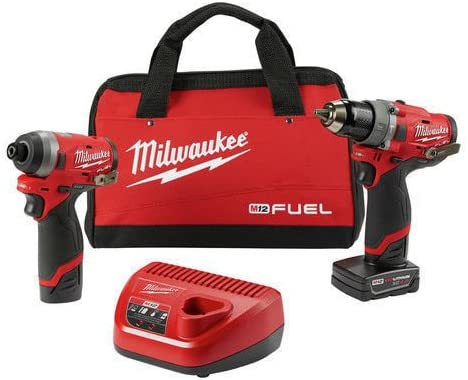
5. Car Audio Tool #5 – Drill
Drills are necessary when drilling mounting holes for your equipment or drilling holes in the firewall to run power wire.
I prefer an impact driver for pretty much everything other than drilling holes. It makes removing screws easier and they are usually a little bit smaller. So they can fit in tight spaces.
So I recommend getting a set with both a normal drill and an impact driver.
The Milwaukee M12 is nice and small for those tight spaces. And it should be plenty powerful for most car audio uses.
Those are my recommendations for the MINIMUM car audio tools you need.
Obviously there are tons of tools out there. So if you want to see some of my other recommendations, check out my Amazon shop:
Car Audio Advice Amazon Store – Installation Tools
These aren’t really needed but will make your job much easier. If you are planning on installing more often, I’d recommend picking these up as well.
Click here for more of my favorite and most essential car audio tools.
More Info:
Installing a high-quality car audio system isn’t just about selecting the right speakers or subwoofers. The foundation of an exceptional sound experience lies in the tools and accessories used during the installation process. Whether you’re a professional installer or a car enthusiast embarking on a DIY project, having the best equipment at your disposal is crucial for achieving optimal sound quality. In this guide, we’ll explore the essential car audio tools and accessories that can transform your installation process and elevate your listening experience.
Why Quality Tools Matter in Car Audio Installation
When it comes to car audio installations, precision and efficiency are key. High-quality tools ensure that every component is installed correctly, reducing the risk of damage to your vehicle or audio equipment. Moreover, the right tools can save you time, making the installation process smoother and more enjoyable. Investing in top-notch equipment also means that your sound system will perform at its best, delivering clear, powerful audio that complements your driving experience.
Essential Car Audio Installation Tools
To achieve a flawless car audio setup, you’ll need a range of specialized tools. Here’s a rundown of the must-have equipment for any car audio installation project:
1. Wiring Tools
Proper wiring is the backbone of any car audio system. Without reliable connections, even the best components can falter. Essential wiring tools include:
- Wire Strippers: Precisely remove the insulation from wires without damaging the conductors.
- Crimping Tools: Securely attach connectors to wires, ensuring a stable electrical connection.
- Multimeter: Test voltage, current, and resistance to troubleshoot electrical issues.
Pro Tip: Choose tools with adjustable settings to accommodate various wire gauges and connector types.
2. Mounting Tools
Properly mounting speakers and other components ensures longevity and optimum performance. Key mounting tools include:
- Screwdrivers and Nut Drivers: Essential for assembling and securing components.
- Drill and Bits: For creating precise holes when installing custom mounts or brackets.
- Panel Removal Tools: Safely remove interior panels without causing damage.
3. Testing and Calibration Devices (Intermediate)
After installation, it’s crucial to test and calibrate your system to ensure it performs as intended. Useful devices include:
- Signal Generators: Provide audio signals for testing speaker response and system clarity.
- Oscilloscopes: Visualize electrical waveforms, helping to diagnose complex issues.
- Sound Level Meters: Measure the output levels to ensure balanced sound distribution.
- Audio Analyzers: Assess various aspects of audio performance, including frequency response and distortion.
4. Installation Accessories
Beyond the primary tools, several accessories can enhance your installation process:
- Cable Management Solutions: Keep wires organized and prevent tangling or interference.
- Heat Shrink Tubing: Protects exposed wire connections from moisture and abrasion.
- Adhesive Mounts and Velcro Strips: Secure components without damaging your vehicle’s interior.
- Anti-Vibration Mounts: Reduce noise and vibration for clearer sound quality.
Enhancement Tip: Investing in quality accessories can significantly improve the durability and aesthetics of your installation.
Best Equipment for Quality Installations
Achieving top-tier sound quality isn’t solely about the installation; the equipment you use plays a pivotal role. Here are some of the best tools and accessories to ensure your car audio system performs at its peak:
High-Precision Wire Strippers
Accurate stripping of wires is fundamental to creating reliable connections. Look for wire strippers that offer:
- Multiple Gauge Settings: Accommodate various wire sizes used in different components.
- Durable Construction: Ensure longevity with high-quality materials resistant to wear and tear.
- Ergonomic Design: Comfortable handles reduce hand fatigue during extensive installations.
Premium Crimping Tools
A strong crimp is essential for preventing electrical failures. Choose crimping tools that feature:
- Consistent Performance: Deliver uniform crimps every time, regardless of wire type.
- Interchangeable Dies: Adapt to different connector sizes and styles as needed.
- Safety Features: Protect against accidental injuries with built-in safety mechanisms.
Advanced Soldering Stations (if that’s your thing)
For those that prefer soldering (even though proper crimps are the way to go for automotive connections), look for soldering stations that offer:
- Temperature Control: Precisely manage heat to suit various solder types and wire gauges.
- Fast Heat-Up Times: Reduce waiting periods and increase efficiency.
- Safety Certifications: Ensure compliance with safety standards for worry-free operation.
Comprehensive Multimeters
A versatile multimeter is invaluable for diagnosing and troubleshooting electrical issues. Opt for models that include:
- Auto-Ranging Capabilities: Automatically detect the required measurement range for ease of use.
- High Accuracy: Provide precise readings to identify subtle electrical discrepancies.
- Durable Build: Resist drops and impacts typical in a workshop environment.
Enhancing Your Installation with the Right Accessories
Accessories are the unsung heroes of a successful car audio installation. They not only streamline the process but also contribute to the system’s overall performance and longevity. Consider incorporating the following into your toolkit:
Cable Management
Keeping your wiring organized is essential for both functionality and aesthetics. Cable management typically includes:
- Zip Ties: Secure wires neatly along predefined paths.
- Cable Sleeves: Bundle multiple cables together, reducing clutter.
- Routing Clips: Attach wires to panels and structures without drilling.
Heat Shrink Tubing Set
Protect your connections and prevent short circuits with heat shrink tubing. A comprehensive set offers:
- Various Sizes: Fit different wire diameters and connection types.
- UV-Resistant Options: Provide added protection against environmental factors.
- Easy Application Tools: Simplify the heat-shrinking process for a professional finish.
Panel and Trim Removal Tools
Avoid damaging your vehicle’s interior with dedicated removal tools, which typically include:
- Soft-Tip Instruments: Prevent scratches and dents during panel removal.
- Flexible Picks: Navigate tight spaces and intricate panel designs.
- Comprehensive Toolkits: Provide all necessary tools in one convenient package.
Anti-Vibration Hardware
Reduce unwanted noise and vibrations in your audio system with specialized mounts and dampeners, such as:
- Rubber or Foam Mounts: Absorb vibrations from speakers and subwoofers.
- Isolating Brackets: Separate components from the vehicle’s frame to minimize resonance.
- Secure Fasteners: Ensure all mounts remain firmly in place during operation.
How Tools Elevate Your Car Audio Installation
At Car Audio Advice, we understand that the quality of your car audio installation is directly tied to the tools you use. That’s why we recommend a curated selection of the best car audio tools and accessories, designed to meet the needs of both professionals and enthusiasts. Here’s how the tools above make a difference:
Precision and Reliability
These tools are manufactured to the highest standards, ensuring precision in every cut, strip, and crimp. Reliable performance means fewer installation errors and a smoother workflow, allowing you to focus on creating the perfect sound system.
Durability and Longevity
Investing in our high-quality tools means you’re equipped to handle countless installations without wear or failure. Durable materials and robust construction provide a long-lasting solution, saving you money in the long run.
User-Friendly Designs
They prioritize ease of use, featuring ergonomic handles, intuitive controls, and clear instructions. This user-centric approach makes the installation process more enjoyable and less fatiguing, even during extensive projects.
Step-by-Step Installation Guide
Embarking on a car audio installation can seem daunting, but with the right tools and a clear plan, you can achieve professional results. Here’s a simplified step-by-step guide to help you through the process:
Step 1: Planning and Preparation
- Assess Your Vehicle: Determine the best locations for speakers, subwoofers, and other components.
- Gather Tools and Accessories: Ensure you have all necessary equipment on hand.
- Review Installation Manuals: Familiarize yourself with the specific requirements of your audio components.
Step 2: Removing Interior Panels
- Use Panel Removal Tools: Carefully detach dashboard panels and trim to access mounting areas.
- Label Components: Keep track of screws and parts to streamline reassembly.
Step 3: Wiring and Connections
- Run Cables Neatly: Use cable management solutions to prevent tangling and interference.
- Secure Connections: Employ crimping tools and soldering irons for durable electrical bonds.
- Test Connections: Use a multimeter to verify the integrity of your wiring before finalizing.
Step 4: Mounting Components
- Position Speakers and Subwoofers: Use mounting tools to ensure components are securely placed.
- Apply Sound Deadening Materials: Enhance acoustic performance by minimizing vibrations.
- Double-Check Alignments: Ensure all components are level and properly oriented.
Step 5: Testing and Calibration
- Power Up the System: Turn on your audio setup to check for functionality.
- Adjust Settings: Use testing devices to calibrate sound levels and balance.
- Fine-Tune Placement: Make minor adjustments to speaker positions for optimal sound distribution.
Step 6: Finalizing Installation
- Reattach Interior Panels: Secure all removed panels and trim, ensuring no gaps or loose parts.
- Organize Cables: Tidy up any remaining wires for a clean and professional look.
- Perform a Final Test: Listen to various audio tracks to confirm the system performs as expected.
Ready to Upgrade Your Car Audio Installation?
Don’t settle for anything less than the best. Equip yourself with top-quality tools and accessories and experience the difference in your car audio installations. Whether you’re enhancing an existing system or starting from scratch, these tools will help you achieve professional-grade results.
Frequently Asked Questions
What are the most essential tools for a beginner in car audio installation?
For beginners, the most essential tools include wire strippers, crimping tools, a multimeter, screwdrivers, and panel removal tools. These basics will cover most installation tasks and help you build a solid foundation for more advanced projects.
How can I ensure the best sound quality in my car audio system?
Achieving the best sound quality involves using high-quality components, meticulous installation practices, and proper calibration. Investing in reliable tools and accessories ensures that every connection is secure and that your system is balanced for optimal performance.
What makes these tools different from others on the market?
These are the tools I personally use and have great success with. Some of it is preference.
Final Thoughts
A high-quality car audio installation is a blend of excellent components and the right tools. By equipping yourself with the best equipment and accessories, you can ensure a seamless installation process and enjoy a superior sound experience every time you hit the road.

